
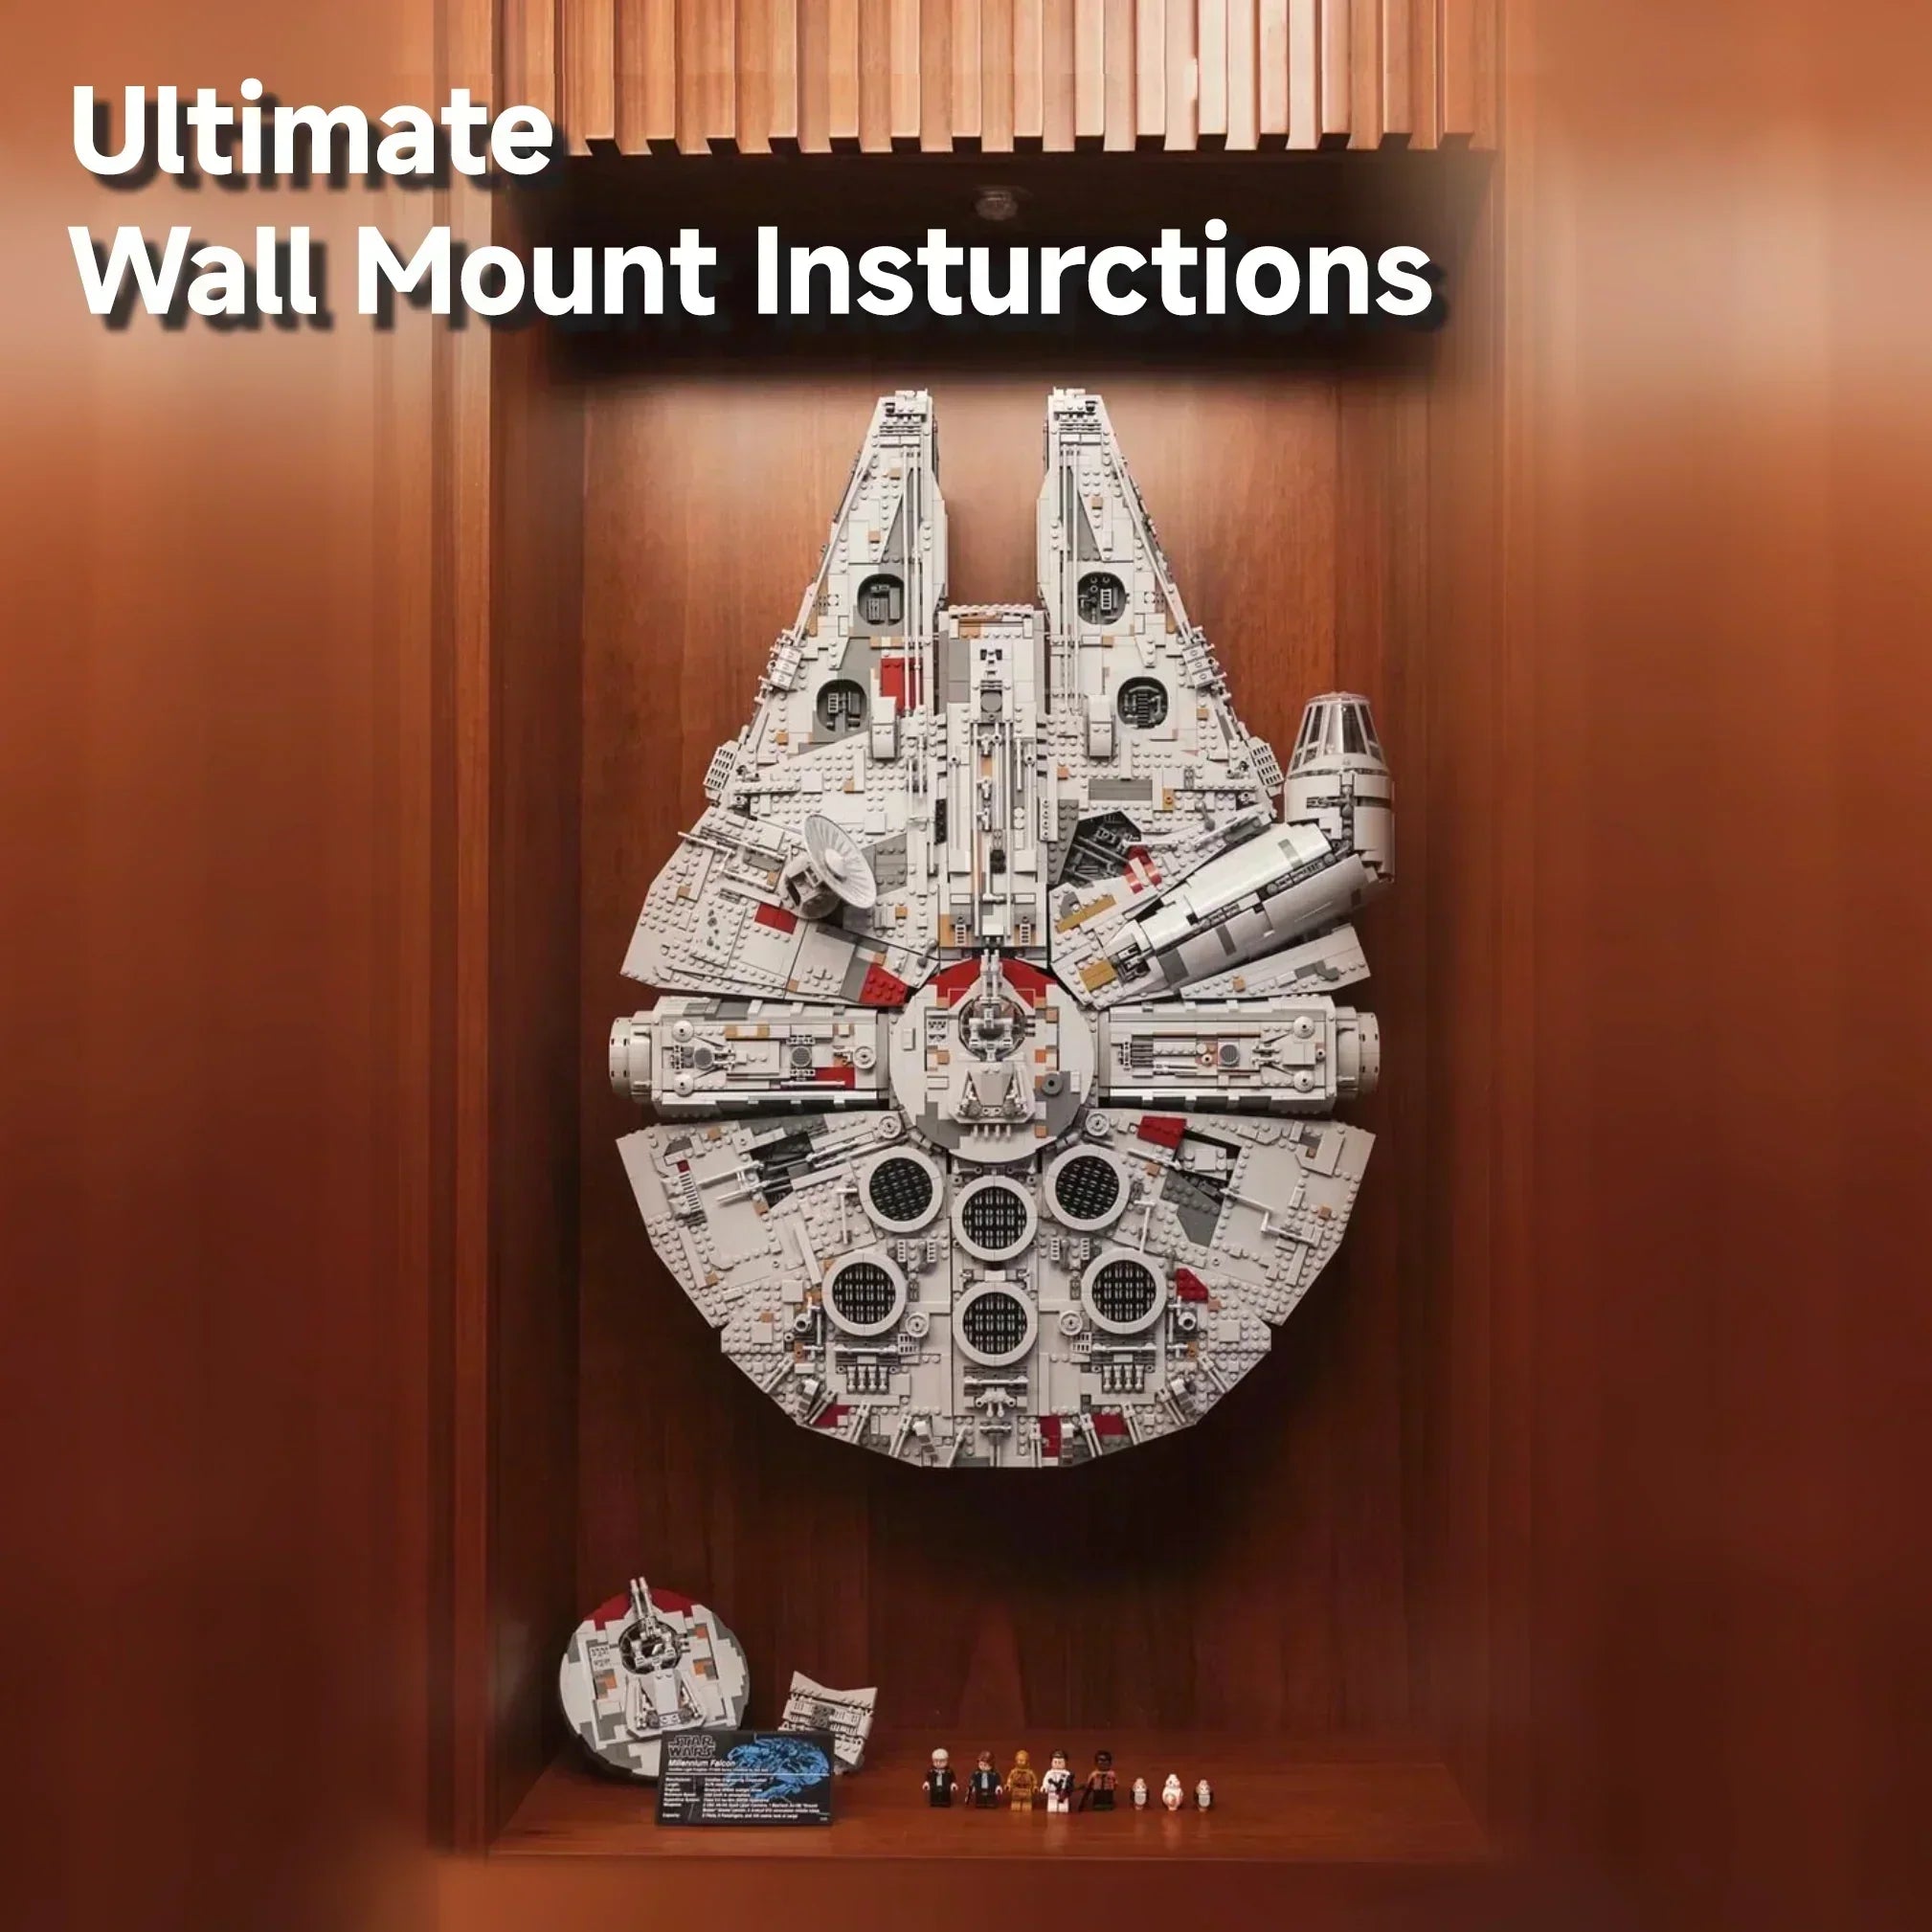
Ultimate Step-by-Step Guide: How to Wall Mount the LEGO Star Wars 75192 UCS Millennium Falcon| Mark's Magic
This is a Hands-On, Step-by-Step Tutorial
If you’ve just finished building the LEGO Star Wars UCS Millennium Falcon, you’ve probably run into the same problem every collector faces:
Where do you actually put it?
It’s one of the largest LEGO sets ever made.
It dominates shelves, barely fits inside most display cabinets, and often ends up hidden instead of showcased.
That’s why many collectors search for how to wall mount a LEGO Millennium Falcon—to turn it from a space problem into a true display centerpiece.
This is a complete, hands-on tutorial that walks you through the entire process using L-shaped brackets, with detailed explanations at every step so you understand not just what to do, but how to do it safely and correctly.

Part 1: Understand the Mounting Principle First (Most Important)
Before buying brackets or drilling anything, you need to understand one critical concept:
The Millennium Falcon is NOT supported by its outer shell
The exterior of the model is made up of:
- Removable panels
- Decorative plates
- Turrets and surface details
These parts are not structural.
If you mount the model using these areas, you risk:
- Panels popping off over time
- Uneven weight distribution
- Stress on small connectors
- Long-term structural damage
The real support comes from inside the model

Inside the central structure, you will find:
- Two black crossbars (left and right)
- A central load-bearing frame
These are the correct support points.
Correct load structure:
Bracket → Black crossbars → Central frame distributes weight
Bracket spacing reference
Typical distance between support points:
9.5–10 cm
⚠️ This is a reference, NOT a fixed rule.
Always measure your own model before installation.
Part 2: What You Need Before Installation
1. L-shaped metal brackets


Recommended specs:
- Quantity: 2
- Width: 3.5–4 cm
- Length: 13–14 cm
- Thickness: ~4 mm
Why size matters
- Too wide → won’t fit inside structure
- Too narrow → unstable support
- Too short → won’t reach internal frame
2. Proper screws and wall fixings
Depending on your wall or cabinet:
- Wood screws
- Wall anchors
- Expansion bolts
Important note
Do NOT assume longer screws are better.
Wrong screws can:
- Crack wood panels
- Fail under load
- Make installation harder
3. Tools
- Drill / screwdriver
- Level
- Measuring tape
- Pencil / masking tape
- Cardboard (for testing)
| Item | Recommended Specification |
|---|---|
| L-Shaped Metal Brackets | 2 pcs, 3.5–4 cm (1.4–1.6 in) wide, 13–14 cm (5.1–5.5 in) long, heavy-duty steel |
| Wood Screws / Wall Fasteners | Suitable for your wall or mounting surface |
| Wall Anchors (if required) | Match your wall type (drywall, masonry, or concrete) |
| Power Drill | With appropriate drill bits |
| Screwdriver / Impact Driver | Compatible with the selected screws |
| Spirit Level | Bubble or laser level |
| Tape Measure | Metric or imperial |
| Pencil or Masking Tape | For marking drilling positions |
| Cardboard Template | Same size as the L-bracket arms (recommended) |
| Soft Cloth or Foam Pad | To protect the model during installation |
| Small Containers or Zip Bags | For storing removed LEGO parts |
| A Second Person | Highly recommended for lifting and alignment |
Before moving on, double-check that your brackets fit inside the Millennium Falcon and that you've measured the spacing directly from your own model. Spending a few extra minutes on preparation can prevent unnecessary drilling or accidental damage during installation.
| Installation Overview | |
|---|---|
| Difficulty | ⭐⭐⭐⭐☆ (Intermediate) |
| Estimated Time | 3–4 hours (excluding wall preparation) |
| People Required | 2 |
| Permanent Wall Modification | Yes |
| Model Disassembly Required | Partial |
| Recommended for | LEGO Star Wars UCS Millennium Falcon (75192) collectors |
Part 3: Plan Your Display Space First
This step is often skipped—but it’s where most mistakes happen.
Check top clearance
You need extra space above the final position because:
👉 The model must be lifted ABOVE the brackets before lowering into place.
If you don’t leave space, installation becomes impossible.
Check bottom clearance
The model should NOT rest on a surface.
Leave space to:
- Inspect brackets
- Adjust position
- Avoid accidental pressure
Check side clearance
Especially the cockpit side:
- Avoid hitting cabinet walls
- Leave space for your hands
- Prevent accidental contact
Check wall or backing strength
⚠️ Critical safety point
Do NOT mount on:
- Thin cabinet backing boards
- Decorative panels
Make sure the structure is:
- Solid
- Load-bearing
- Securely fixed
Part 4: Disassemble Key Parts Before Mounting
Step 1: Take reference photos
Before removing anything, photograph:
- Top
- Center
- Sides
- Bottom
This makes reassembly much easier.
Step 2: Remove the Upper and Lower Turrets
Before exposing the central frame, you'll need to remove the upper and lower quad laser turrets. This creates enough clearance for the L-brackets and makes it much easier to access the internal support structure.
Remove the upper turret
Start by lifting off the upper quad laser turret from the top of the model. Set it aside in a safe place to avoid damaging the delicate details.

Remove the red locking pin
With the upper turret removed, you'll gain access to a red Technic pin inside the opening.
Carefully pull out this red pin before attempting to remove the lower turret.
This pin acts as a locking connector that secures the lower turret in place. If you try to pull the lower turret out without removing it first, you'll find that the assembly won't come free and forcing it may place unnecessary stress on the surrounding LEGO elements.
Remove the lower turret
Once the red locking pin has been removed, the lower quad laser turret can be detached easily from underneath the model.
Removing both turrets provides a clear opening through the center of the Millennium Falcon, giving you full access to the internal support beams and enough room to position the L-brackets correctly.
Pro Tip: Store the upper turret, lower turret, and red Technic pin together in a small container or zip bag. These pieces are easy to misplace during installation, and keeping them together makes reassembly much quicker once the wall mount is complete.
 Expose:
- Black crossbars
- Mounting path
👉 If you can’t clearly see the internal structure, do not continue.
Reinstall the red locking pin


After removing the lower turret, reinsert the red Technic pin back into its original position before continuing with the wall mount installation.
Although the lower turret will remain off during the mounting process, the red pin is part of the Millennium Falcon's internal structure and should be returned to its original location. Reinstalling it helps keep the surrounding assembly properly secured while you continue working on the model.
Important: Only the lower turret remains removed to provide clearance for the wall mount. The red Technic pin should be reinstalled immediately after the lower turret has been removed.
Step 3: Remove loose side parts

Especially:
- Cockpit area
- Edge panels
- Light connections
Part 5: Measure the Internal Support Points
Choosing the Best Support Position
Once you've located the internal structure, you'll notice that the brackets can be positioned under either of the two main horizontal support beams.
This gives you two possible mounting options, depending on your preferred display setup.
Option 1 – Upper Support Beam (Recommended for a Level Display)

Supporting the model on the upper beam keeps the Millennium Falcon in a more upright, level position against the wall.
This is the preferred option if you want the ship to appear centered and balanced, making it ideal for most wall displays.
It also requires less disassembly, as the surrounding LEGO elements can usually remain in place.
Option 2 – Lower Support Beam (Recommended for a Angled Display)

If you'd like the Millennium Falcon to sit at a slightly forward-tilted angle, the lower support beam is the better choice.

This mounting position naturally changes the display angle, giving the ship a more dynamic "in-flight" appearance that many collectors prefer.
Before using this support point, however, you'll need to remove the small ladder assembly located in front of the lower beam. The ladder blocks the bracket from sliding fully underneath the beam, so removing it ensures the bracket can make proper contact with the internal structure.
Although this option requires one additional preparation step, it still provides excellent structural support when installed correctly.
Which option should you choose?
- Choose the upper support beam if you prefer a more upright and balanced wall display.
- Choose the lower support beam if you'd like the Millennium Falcon to be displayed at a slight angle for a more dynamic presentation.
Whichever option you choose, always test the bracket position with a cardboard template before drilling any holes to ensure proper fit and alignment.
Step 1: Locate the black crossbars
These are your main support targets.
Step 2: Measure spacing
Reference:
9.5–10 cm
Important
Use ONE method consistently:
👉 Inner edge to inner edge (recommended)
Mixing methods will cause misalignment.
Step 3: Check bracket depth
Make sure the bracket:
- Slides under the crossbar
- Does NOT push against other parts
👉 If you feel resistance, stop immediately.
Part 6: Test Everything Before Drilling (Highly Recommended)
Use a cardboard template
Cut two strips:
- 3.5–4 cm wide
- 13–14 cm long
Simulate real installation
Check:
- Both brackets fit
- Alignment is correct
- No collision with parts
- Depth is sufficient
Important
If cardboard doesn’t fit, metal won’t either.
Part 7: Install the Brackets
Step 1: Mark positions
- Draw center line
- Mark bracket spacing
Step 2: Keep everything level
If brackets are uneven:
- One side takes more weight
- Model may tilt
Step 3: Install gradually

- Start loose
- Adjust alignment
- Tighten slowly
Important
If screws become hard to drive → STOP.
Wrong screw size can damage your structure.
Step 4: Test stability
Before mounting the model:
- Press brackets lightly
- Check for movement
👉 If anything moves, do not proceed.
Part 8: Mounting the Model (Critical Step – 2 People Required)
Step 1: Clear workspace
Remove all obstacles.
Step 2: Lift correctly
- One person supports top & center
- One supports bottom & alignment
Important
Never lift using:
- Cockpit
- Panels
- Turrets
Step 3: Rotate to vertical

Do this slowly.
👉 Do NOT let the bottom edge carry all the weight.
Step 4: Raise above brackets
You must lift slightly higher than final position.
Step 5: Align openings
Guide brackets into central structure.
Critical warning
If you feel resistance → STOP.
Do NOT force the model.
Step 6: Lower slowly
Both sides must land at the same time.
Step 7: Confirm support
Check:
- Both crossbars supported
- Both brackets engaged
- No panel carrying weight
Part 9: Final Safety Checks (Do NOT Skip)
Check structure
- No bending
- No gaps
Check alignment
- Model level
- No tilt
Check brackets and wall
- No movement
- Screws tight
Release slowly
Do NOT let go immediately.
Part 10: Reinforce the Gravity-Dependent Upper Panels Before Wall Mounting
When the LEGO® Star Wars™ 75192 Millennium Falcon is displayed horizontally, several upper hull panels remain in position partly because gravity holds them against the main structure.

Once the model is mounted vertically, gravity begins pulling these panels outward instead. Some of the original low-friction axle and connector points may therefore feel noticeably looser, even though they work correctly when the model is placed flat.
Rather than relying on double-sided tape, the loose connections can be reinforced by replacing selected axle connections with compatible Technic friction pins.
Important: Complete these modifications before lifting the Millennium Falcon onto the wall brackets. Work over a soft surface and remove the upper turret and loose hull panels first.
Parts Used for the Reinforcement
The reinforcement shown below uses:
- One compatible black double-ended Technic friction pin
- One tan Technic axle pin already used elsewhere on the model
- The original yellow axle removed from the loose upper panel
This method allows the tan axle pin to be reused at the connection that needs stronger retention.
Step 1: Identify the Gravity-Dependent Hull Panels
Inspect the upper surface of the Millennium Falcon and locate the panels that move easily when the model is tilted.
Pay particular attention to:
- The upper front hull panels
- The sections beside the sensor dish
- The panels near the cockpit corridor
- The rear upper panels beside the engine area
- Any panel that lifts or moves when gently pulled outward
The arrows in the reference image show the main areas that should be checked before vertical display.
Not every marked section necessarily uses the same connector, so inspect each location individually before changing any parts.
Step 2: Remove the Tan Axle Pin from the Front Loose Section
One of the loose front assemblies uses a tan Technic axle pin.
Carefully remove this tan axle pin and replace it with a compatible black double-ended Technic friction pin.
The black pin creates a tighter connection at this location while also freeing the tan axle pin for use on another upper panel.
Push the black pin fully into position, but do not force it. The surrounding pieces should remain correctly aligned without bending or separating.
Step 3: Replace the Yellow Axle on the Loose Upper Panel

Locate the loose upper panel that uses the yellow axle shown in the reference image.
Remove the yellow axle and replace it with the tan Technic axle pin removed during the previous step.
Make sure that:
- The axle end enters the cross-shaped axle hole
- The pin end enters the corresponding round Technic hole
- The tan pin is fully seated
- The panel remains correctly aligned with the surrounding hull
The friction created by the tan axle pin helps prevent the panel from sliding outward when the Millennium Falcon is mounted vertically.
The connection should feel noticeably firmer while still remaining removable if the model needs to be disassembled later.
Step 4: Check the Other Marked Panels
Repeat the same inspection around all of the arrow-marked areas.
Where a panel is held by a loose, gravity-dependent connection, determine whether a compatible friction pin can replace the original low-friction connector.
Do not assume that every location requires the same part. Only make a replacement when the new connector matches the existing round and cross-shaped Technic holes correctly.
Never force a friction pin into an incompatible opening, as this may place unnecessary stress on the surrounding LEGO® elements.
Step 5: Perform a Supported Vertical Test
Before placing the model on the wall, ask another person to help support it over a carpeted or padded area.
Slowly tilt the Millennium Falcon toward its final display angle and observe each reinforced panel.
Check that:
- None of the panels slide outward.
- No panel begins separating from the main structure.
- The front panels do not press against the upper turret position.
- The cockpit-side panels remain correctly aligned.
- The reinforced connections do not twist or bend nearby elements.
Return the model to a horizontal position immediately if any section begins to move.
Step 6: Reinstall the Upper Turret Last

The upper turret should remain removed while the surrounding hull panels are being reinforced and tested.
Once the Millennium Falcon is securely mounted and every nearby panel has passed the vertical test, reinstall the turret as the final component.
Gently check the surrounding panels again to confirm that none of them can lift, rotate or press against the turret base.
This is especially important because a loose upper panel may push the turret out of position if the panel begins moving away from the model.
Reinforcing the surrounding panels greatly reduces this risk, but the turret should still be checked separately after installation.
Part 11: Reassemble the Model
Install in order:
- Central panels
- Side modules
- Small details
Important
Do NOT reinstall parts that:
- Hit the wall
- Push the model outward
- Block the brackets
Installation Summary
| Step | Action |
|---|---|
| 1. Prepare | Gather all tools, brackets, and hardware. Make sure your mounting surface is strong enough to support the model. |
| 2. Disassemble | Remove the upper turret, remove the red Technic pin, detach the lower turret, reinstall the red pin, then remove the central panels and any parts that block the brackets. |
| 3. Locate the Support Beams | Identify the two internal support beam options and choose the one that best suits your display. For maximum stability, the lower support beam is recommended. |
| 4. Measure & Test | Measure the bracket spacing directly from your model and test the fit with a cardboard template before drilling. |
| 5. Install the Brackets | Mark the mounting position, drill the holes, and secure both L-brackets while keeping them perfectly level. |
| 6. Mount the Model | Lift the Millennium Falcon with two people, align the brackets with the chosen support beams, and slowly lower the model into position. |
| 7. Inspect & Reassemble | Confirm both brackets are fully supporting the internal frame before reinstalling any removable LEGO components that won't interfere with the wall. |
 Final Thoughts: Turn Your Build Into a Display Centerpiece

Wall mounting a LEGO Millennium Falcon isn’t just about saving space.
It’s about showcasing the model the way it deserves.

When done correctly:
- The brackets are nearly invisible
- The model appears to float
- The entire silhouette becomes the focus

Is Wall Mounting Safe?
When installed correctly, this mounting method provides a stable and secure way to display your LEGO Star Wars UCS Millennium Falcon.
The key factors are using strong, heavy-duty metal L-brackets, suitable wall fixings, and ensuring the brackets are supporting the model's internal frame rather than its exterior panels.
Under normal display conditions, the model should remain securely in place without any issues, provided it isn't frequently removed, repositioned, or subjected to unnecessary force. Like any wall-mounted display, it's good practice to periodically check the brackets and mounting hardware to ensure everything remains tight and secure.
However, wall mounting isn't the right solution for everyone.
If you'd rather avoid drilling into your wall, or simply prefer a lower-risk display option, a floor-standing display case is an excellent alternative. A quality display case allows you to showcase the UCS Millennium Falcon while keeping it protected and easily accessible, without the need for permanent wall installation.


Ultimately, the best display solution comes down to your available space, your preferred presentation style, and how comfortable you are with wall mounting such a large LEGO model.


Written by MaZhiyuan



















1 comment
This is a fantastic guide, thank you! I was hoping for more detail on how to secure top parts without the help of gravity… I had the exact same idea for mounting and have completed it but the top front panels and gun turret don’t secure well without the help of gravity.
I used some double-sided tape in strategic locations at first but the top front panels came loose and pried the turret out of its spot. The turret landed on the floor and broke and took me a while to reassemble.
Deece
Leave a comment
This site is protected by hCaptcha and the hCaptcha Privacy Policy and Terms of Service apply.