
How to DIY your LEGO Up house display : The Ultimate Guide to the Up House LEGO Creative DIY Display solutions| Mark's Magic
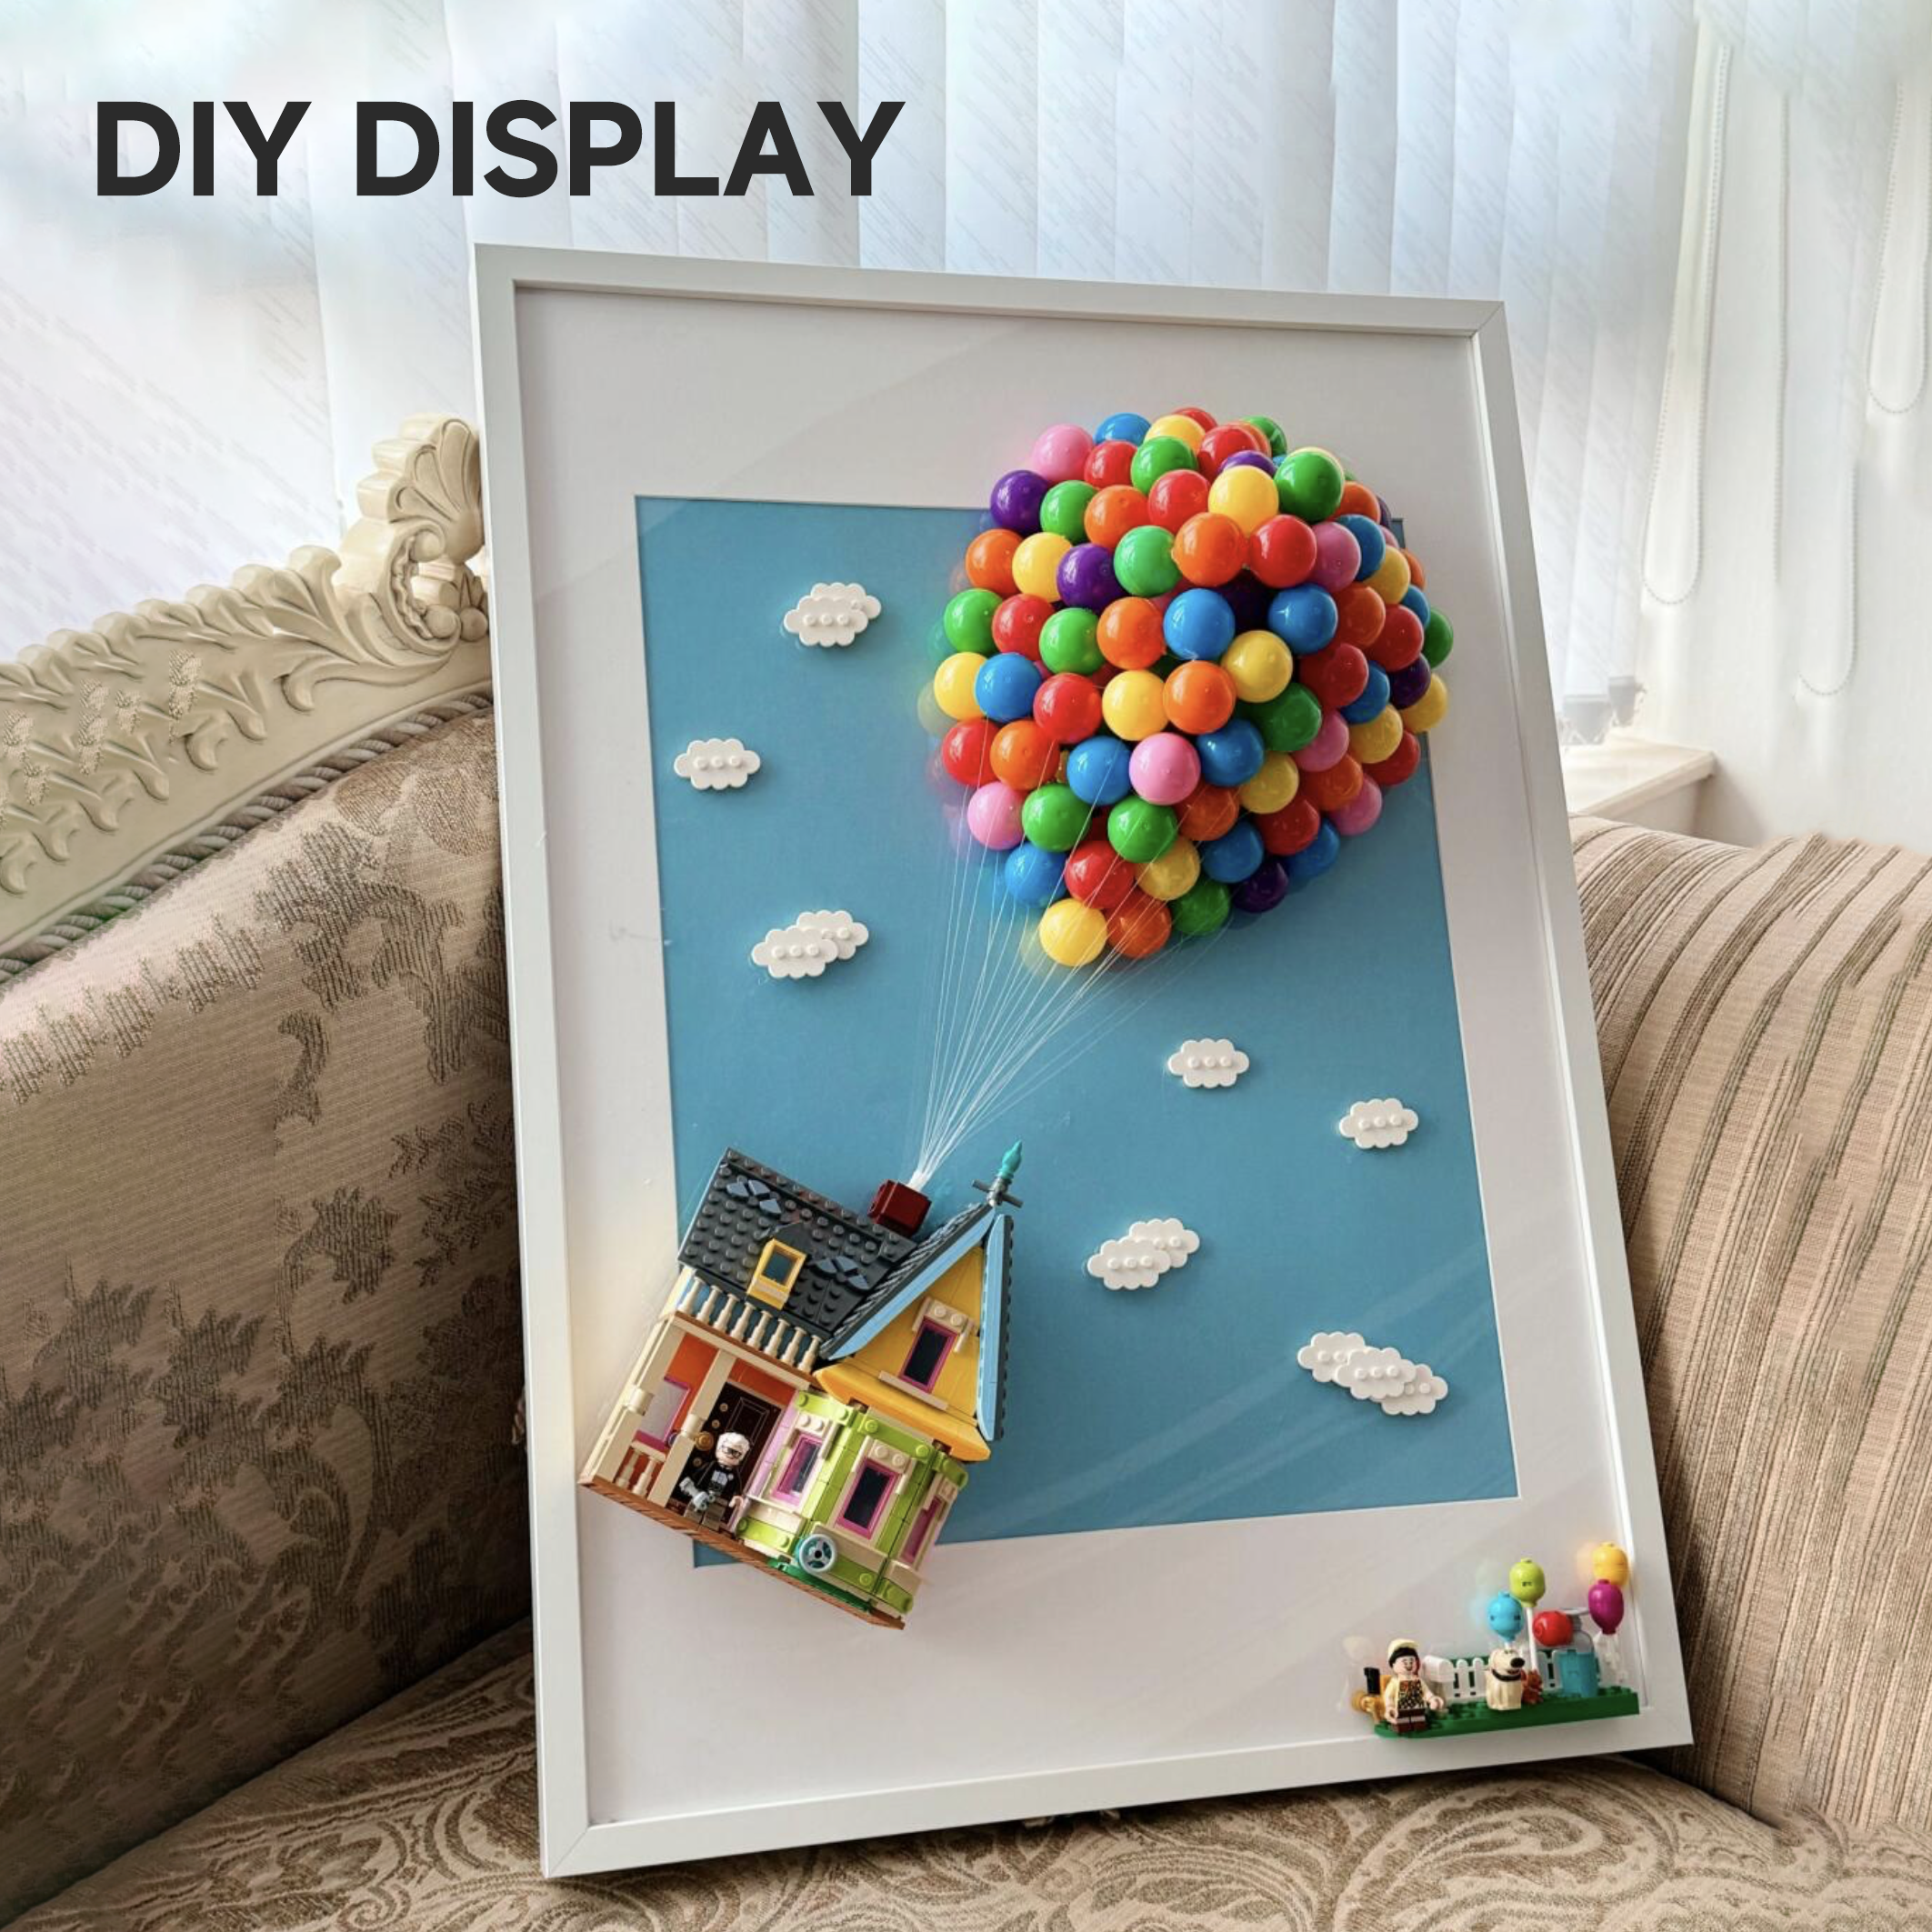
In recent years, the LEGO Up House has become one of the most heartwarming and visually charming sets among LEGO enthusiasts. To celebrate this miniature symbol of adventure and dreams, many premium display frame brands——have introduced custom display frames for the LEGO Up House, perfectly tailored to preserve its colorful charm and cinematic emotion.


These ready-made Up House display frames feature museum-grade acrylic, UV protection, and vivid printed backdrops that recreate the dreamy sky from Pixar's beloved film Up. They allow collectors to turn their LEGO creations into timeless wall art.
However, if you love adding a personal touch to your collection, there’s another wonderful path: DIY your own LEGO Up House display! Creating it yourself not only deepens your connection with the set but also brings a sense of joy, especially when shared with family members or friends. The process of building, painting, and arranging becomes a meaningful experience—just like the movie’s message about finding adventure in the simple moments of life.

Materials You’ll Need for a DIY Up House LEGO Display
If you decide to embark on your own creative journey, here’s everything you’ll need to bring your LEGO Up House display to life:

| Material | Description | Inspiration Source |
|---|---|---|
| LEGO Bricks | Core pieces for the house structure | Original LEGO Up House set |
| IKEA RIBBA 70x50 Frame | Provides a solid foundation | LEGO community builds |
| Color Palette | Bright peach, blue, green, and yellow bricks | Pixar’s Up house design |
| Accessories | LEGO minifigures of Carl, Ellie, and Dug | Fan MOCs & dioramas |
| Tools | Brick separator, storage containers, scissors, fishing line, hot glue gun | Enthusiast recommendations |
💡 Pro Tip: Pay attention to color accuracy—the pastel tones of the LEGO Up House make a huge visual difference. As one Reddit builder noted, “I never realized how important the right colors were until I saw my Up House finally come together.”
Step-by-Step Tutorial: How to Craft Your Up House Display
Step 1: Modify the LEGO Set
-
Remove the original LEGO balloons.
-
Take out the furniture inside the house to reduce the total weight for wall mounting.
-
Slightly modify the back of the house and chimney to make them easier to attach .

-
DIY a small grassy platform for placing the minifigures.

Since there’s no gap between the chimney and the frame to hide the balloon strings, you should remove the top section of the chimney and also take off a small part at the back to make it easier to attach.

Step 2: Assemble the Balloons
-
I used seven colors, building 20 pieces for each color, and later added more with fishing lines—though I didn’t end up using them all.

-
The main color palette includes red, orange, yellow, green, and blue, accented with a few pink and purple pieces for variety.

Step 3: Attach the Balloons
-
First, plan the composition and layout of each element before sticking them down.
-
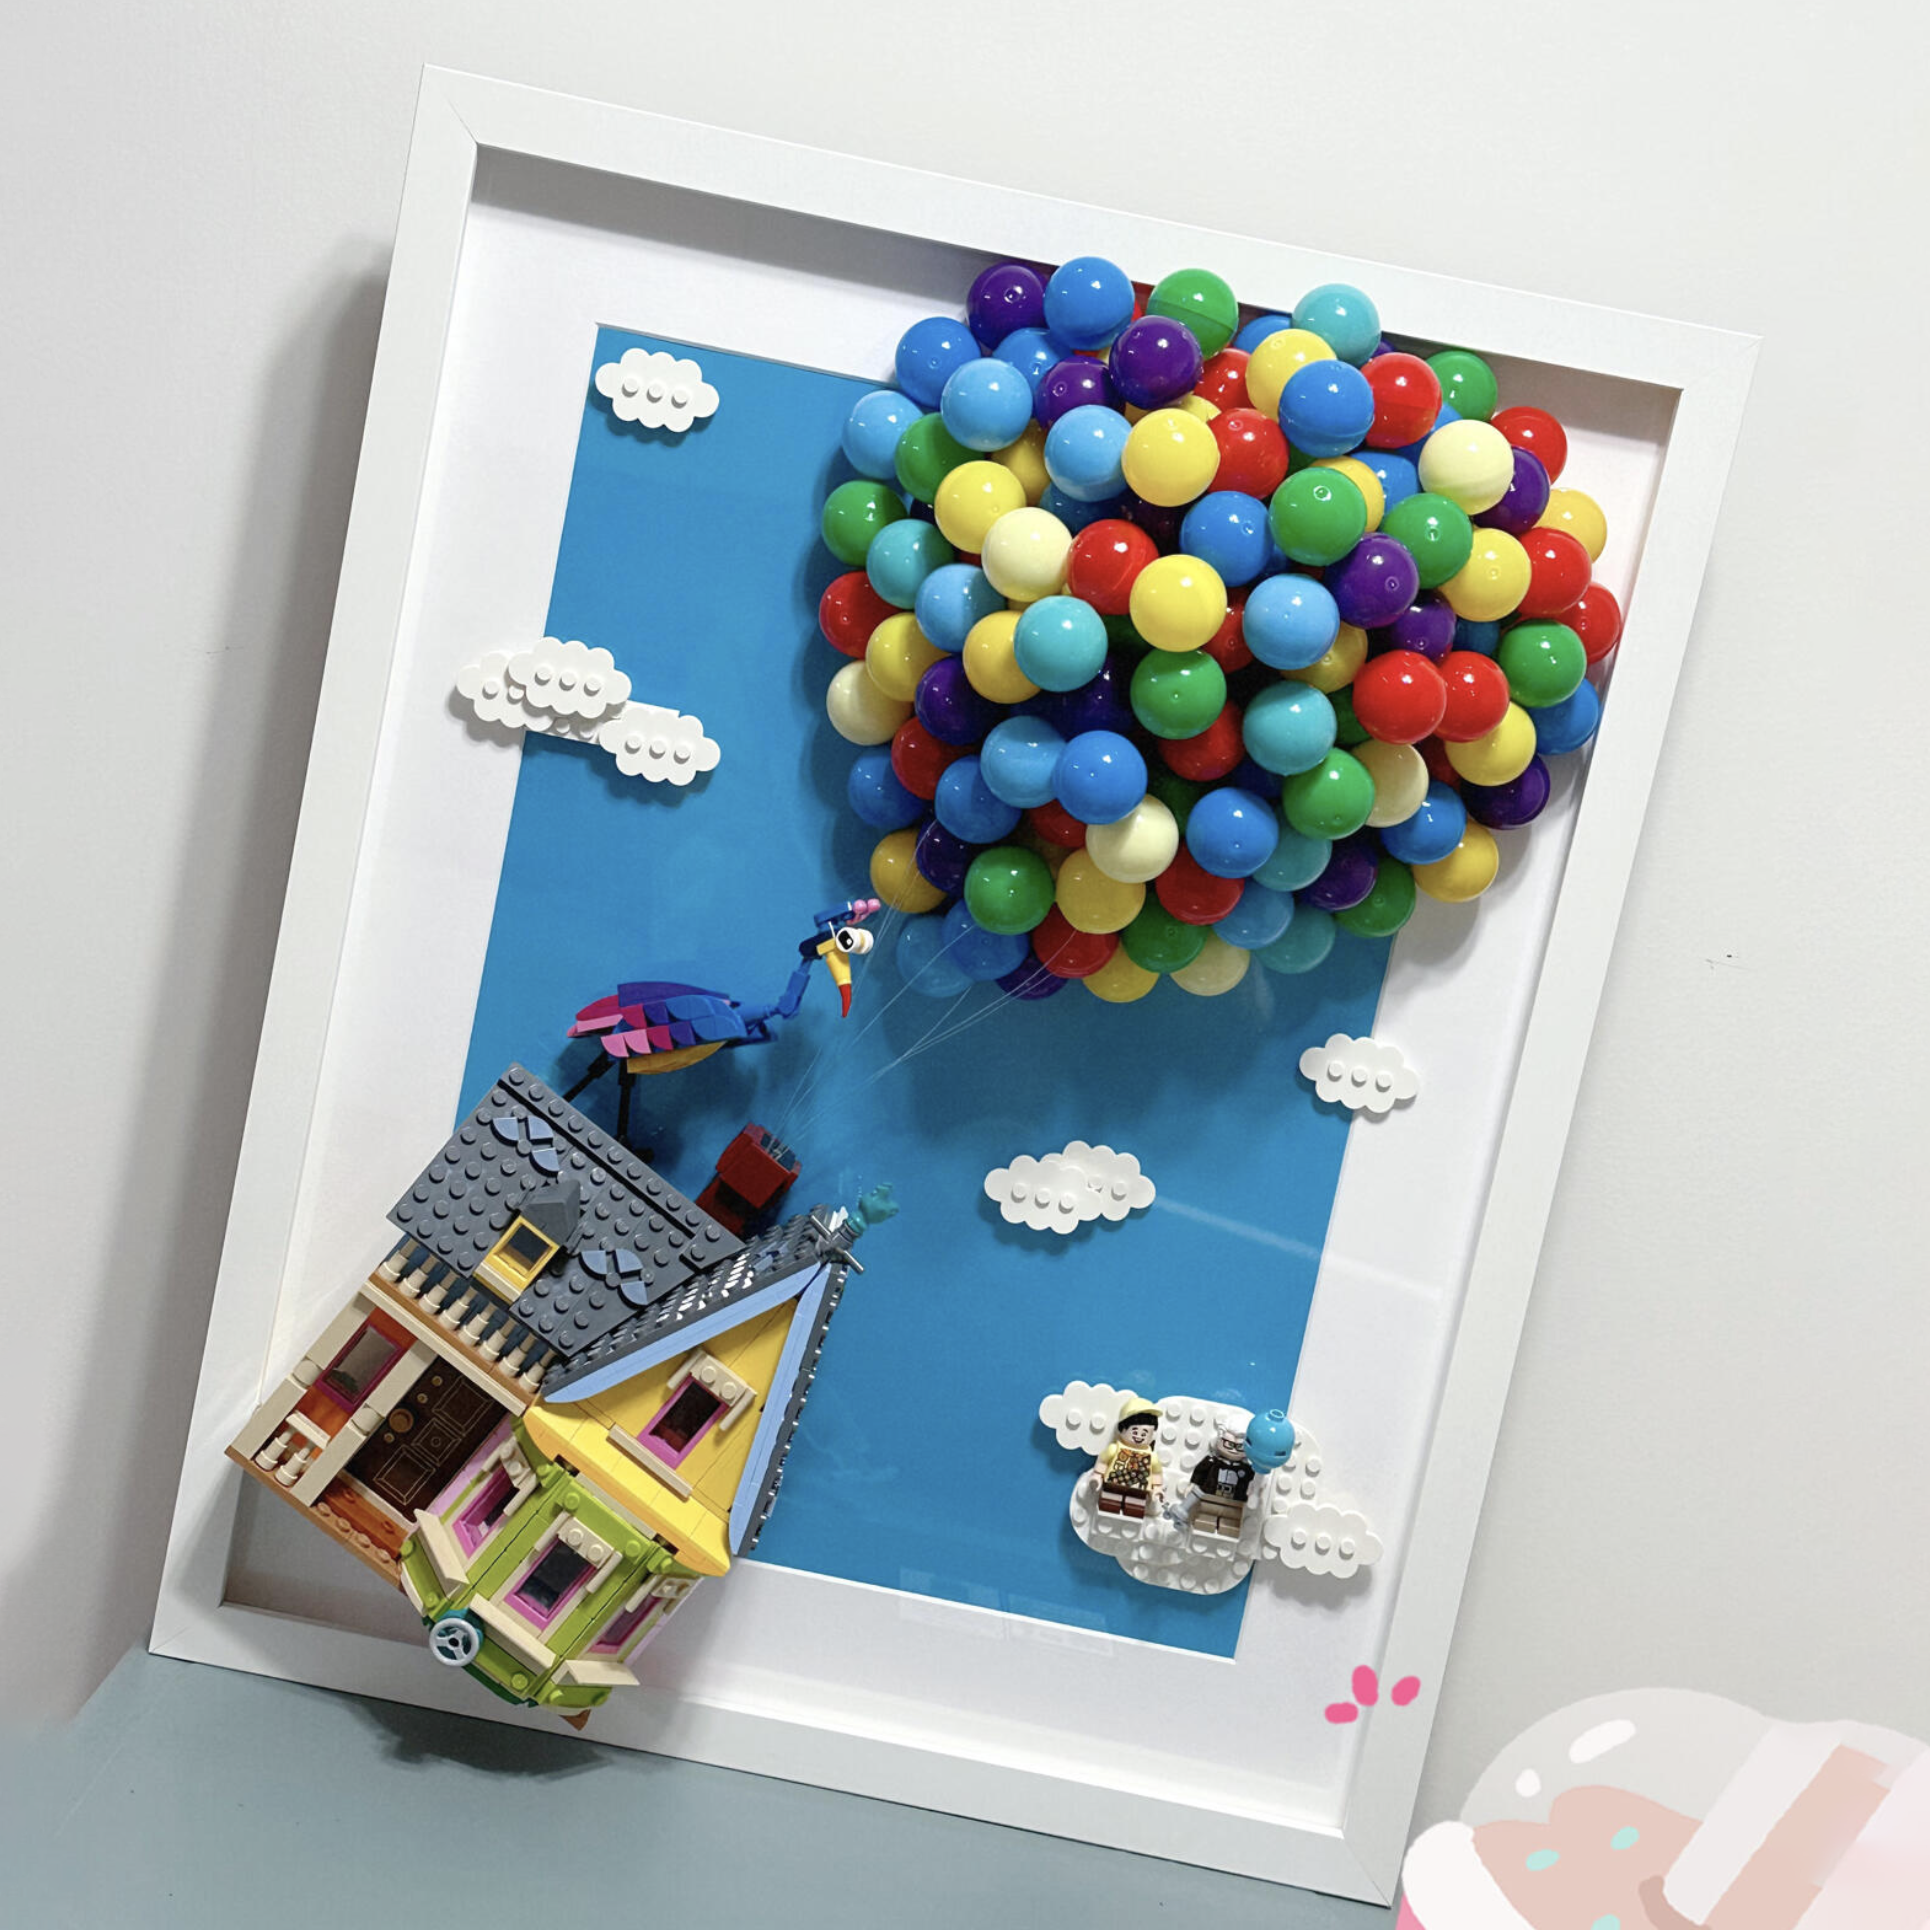
To shape the balloon cluster, start by gluing the outermost layer first, then work inward layer by layer. Aim for a symmetrical, teardrop-shaped silhouette that looks full and balanced.

-
Begin each layer with the balloons that require fishing lines—about five per layer. Tie or clip the lines to keep them from tangling.

-
If you make a mistake, don’t worry—simply pull off and reattach the balloon pieces!
Step 4: Align the Strings & Mount the House
-
I chose to straighten all the fishing lines at the very end (though not every line ended up perfectly straight—it’s challenging but adds charm!). Alternatively, you can glue the lines to the frame layer by layer to keep them taut.
-
Once all the strings are straightened, bind them together and insert them securely into the chimney.
-
Finally, attach the house, clouds, and grassy platform firmly onto your frame or base.

Straighten the balloon strings and tuck them into the chimney.
Once you’ve attached the house, clouds, and lawn — it’s all done!

Pros & Cons of a DIY Up House LEGO Display
Pros:
-
Adds a personal, handmade touch to your LEGO collection
-
Fun and creative bonding activity for families
-
Perfect for social media photos and room decor
-
Unique and fully customizable design
Cons:
-
Time-consuming, especially for first-time builders
-
Requires dedicated workspace and patience
Still, most builders agree that the effort pays off—seeing your LEGO Up House come to life as a colorful, one-of-a-kind display is deeply satisfying.


Ready-Made vs. DIY: Finding Your Perfect Display
If you prefer convenience and a professional finish, a ready-made display frame for LEGO Up House is a perfect solution—crafted from premium PMMA acrylic, with optional LED lighting and precision-cut wooden borders. It turns your Up House LEGO set into a work of art worthy of Pixar’s legacy.
On the other hand, the DIY Up House LEGO Display lets you explore your creativity. It’s a fulfilling weekend project—paint your own backdrop, arrange the balloons just the way you want, and proudly showcase your craftsmanship.
Whichever path you choose, the result is the same: a celebration of adventure, imagination, and nostalgia.
Written by MaZhiyuan


Leave a comment
This site is protected by hCaptcha and the hCaptcha Privacy Policy and Terms of Service apply.