
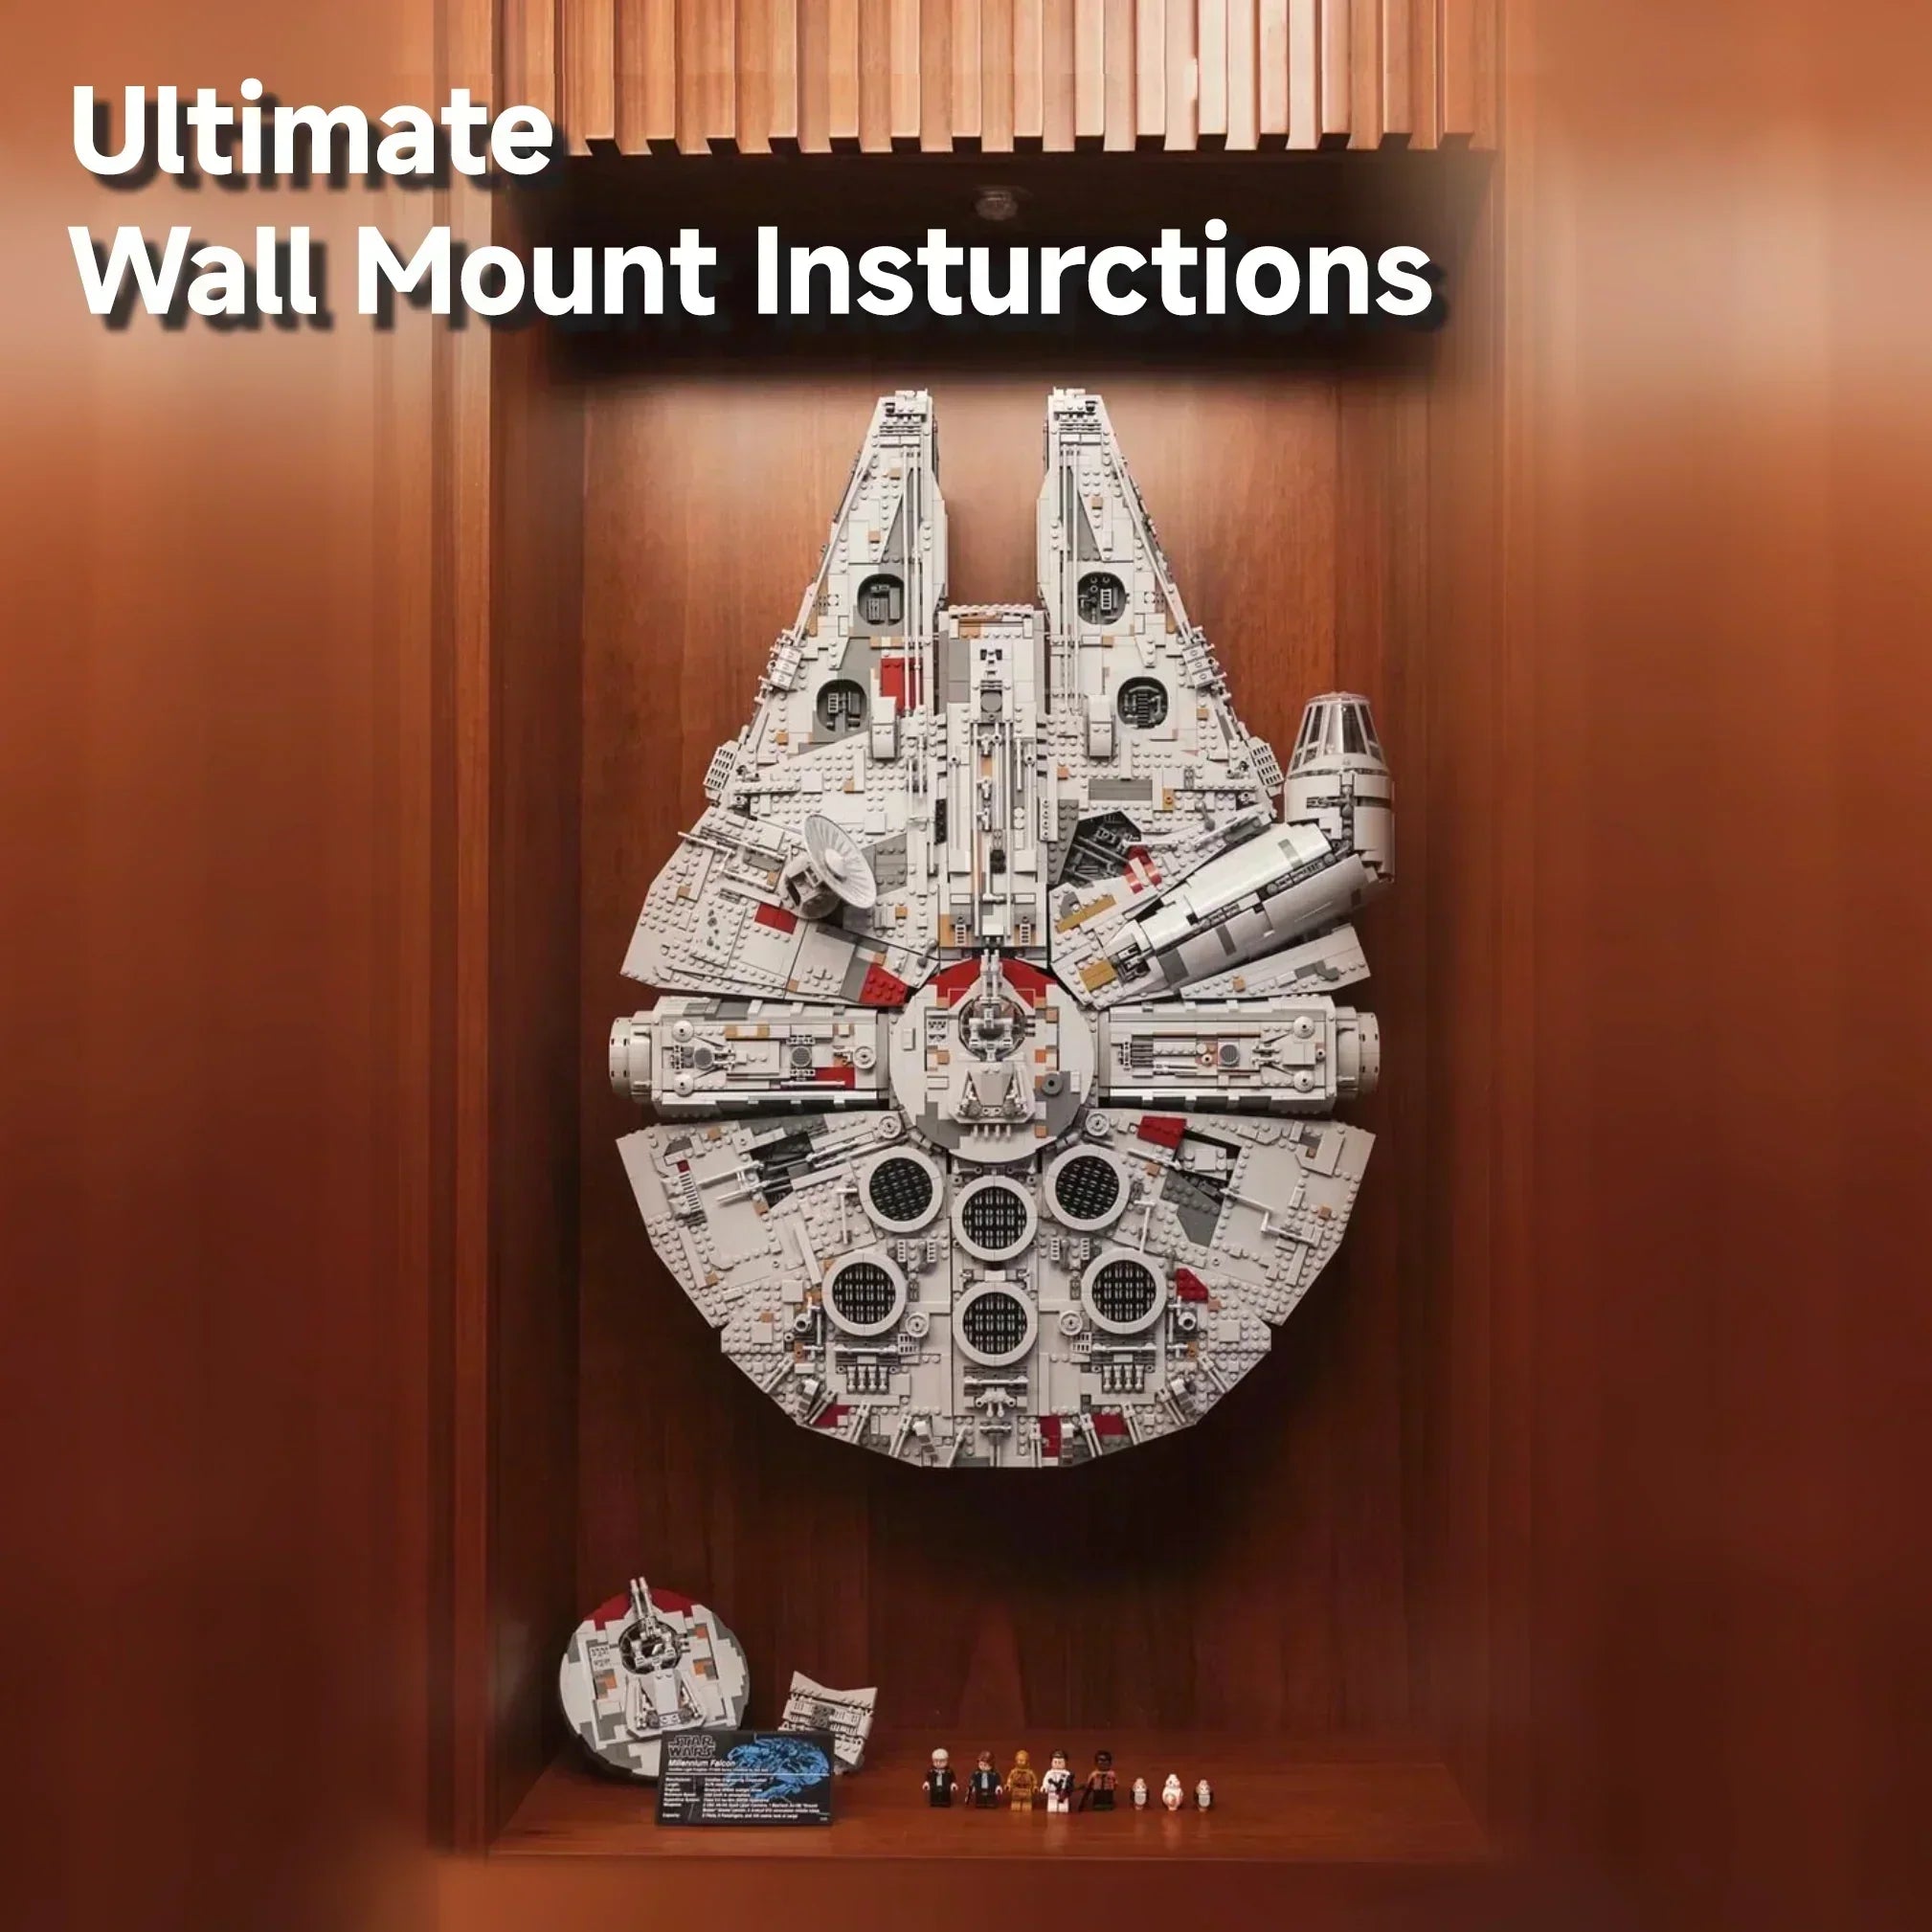
Guide ultime étape par étape : comment fixer au mur le LEGO Star Wars 75192 UCS Millennium Falcon | Mark's Magic
Voici un tutoriel pratique, étape par étape
Si vous venez de terminer la construction du LEGO Star Wars UCS Millennium Falcon, vous avez probablement rencontré le même problème que tous les collectionneurs :
Où le mettre concrètement ?
C’est l’un des plus grands sets LEGO jamais fabriqués.
Il prend toute la place sur les étagères, rentre à peine dans la plupart des vitrines et finit souvent caché au lieu d’être exposé.
C’est pourquoi de nombreux collectionneurs recherchent comment fixer au mur un LEGO Millennium Falcon—pour transformer un problème d’espace en véritable pièce maîtresse à exposer.
Il s’agit d’un tutoriel pratique complet qui vous guide à travers l’ensemble du processus à l’aide d’équerres en L, avec des explications détaillées à chaque étape afin que vous compreniez non seulement quoi faire, mais aussi comment le faire en toute sécurité et correctement.

Partie 1 : Comprendre d’abord le principe de montage (le plus important)
Avant d’acheter des équerres ou de percer quoi que ce soit, vous devez comprendre un concept essentiel :
Le Millennium Falcon n’est PAS soutenu par sa coque extérieure
L’extérieur du modèle est composé de :
- Panneaux amovibles
- Plaques décoratives
- Tourelles et détails de surface
Ces pièces ne sont pas structurelles.
Si vous fixez le modèle à l’aide de ces zones, vous risquez :
- Panneaux qui se détachent avec le temps
- Répartition inégale du poids
- Contraintes sur les petits connecteurs
- Dommages structurels à long terme
Le véritable support vient de l’intérieur du modèle

À l’intérieur de la structure centrale, vous trouverez :
- Deux traverses noires (à gauche et à droite)
- Une structure centrale porteuse
Voici les points de support corrects.
Structure de charge correcte :
Équerre → traverses noires → La structure centrale répartit le poids
Référence d’espacement des équerres
Distance typique entre les points de support :
9,5 à 10 cm
⚠️ Ceci est une référence, PAS une règle fixe.
Mesurez toujours votre propre modèle avant l’installation.
Partie 2 : Ce dont vous avez besoin avant l’installation
1. Équerres métalliques en L


Spécifications recommandées :
- Quantité : 2
- Largeur : 3,5–4 cm
- Longueur : 13–14 cm
- Épaisseur : ~4 mm
Pourquoi la taille est importante
- Trop larges → ne rentreront pas dans la structure
- Trop étroites → support instable
- Trop courtes → n’atteindront pas la structure interne
2. Vis et fixations murales appropriées
Selon votre mur ou votre meuble :
- Vis à bois
- Chevilles murales
- Boulons à expansion
Remarque importante
Ne présumez PAS que des vis plus longues sont meilleures.
De mauvaises vis peuvent :
- Fissurer les panneaux en bois
- Céder sous la charge
- Rendre l’installation plus difficile
3. Outils
- Perceuse / tournevis
- Niveau à bulle
- Mètre ruban
- Crayon / ruban de masquage
- Carton (pour les tests)
| Élément | Spécifications recommandées |
|---|---|
| Équerres métalliques en L | 2 pièces, 3,5–4 cm (1,4–1,6 po) de large, 13–14 cm (5,1–5,5 po) de long, en acier résistant |
| Vis à bois / fixations murales | Adaptés à votre mur ou surface de montage |
| Chevilles murales (si nécessaire) | Adaptez-les à votre type de mur (cloison sèche, maçonnerie ou béton) |
| Perceuse électrique | Avec des forets adaptés |
| Tournevis / visseuse à chocs | Compatible avec les vis sélectionnées |
| Niveau à bulle | Niveau à bulle ou laser |
| Mètre ruban | Métrique ou impérial |
| Crayon ou ruban de masquage | Pour marquer les emplacements de perçage |
| Gabarit en carton | De la même taille que les bras des équerres en L (recommandé) |
| Chiffon doux ou coussin en mousse | Pour protéger le modèle pendant l’installation |
| Petits récipients ou sachets à fermeture zip | Pour ranger les pièces LEGO retirées |
| Une deuxième personne | Vivement recommandé pour le levage et l’alignement |
Avant de poursuivre, vérifiez une nouvelle fois que vos équerres s’insèrent bien dans le Millennium Falcon et que vous avez mesuré l’espacement directement sur votre propre modèle. Consacrer quelques minutes supplémentaires à la préparation peut éviter de percer inutilement le mur ou d’endommager accidentellement le modèle pendant l’installation.
| Vue d’ensemble de l’installation | |
|---|---|
| Difficulté | ⭐⭐⭐⭐☆ (Intermédiaire) |
| Durée estimée | 3 à 4 heures (sans compter la préparation du mur) |
| Nombre de personnes requis | 2 |
| Modification permanente du mur | Oui |
| Démontage du modèle requis | Partiel |
| Recommandé pour | Collectionneurs du LEGO Star Wars UCS Millennium Falcon (75192) |
Partie 3 : Planifier d’abord l’espace d’exposition
Cette étape est souvent ignorée, mais c’est là que se produisent la plupart des erreurs.
Vérifiez l’espace au-dessus du modèle
Vous avez besoin d’un espace supplémentaire au-dessus de la position finale, car :
👉 Le modèle doit être soulevé AU-DESSUS des équerres avant d’être abaissé pour être mis en place.
Si vous ne laissez pas d’espace, l’installation devient impossible.
Vérifiez l’espace sous le modèle
Le modèle NE doit PAS reposer sur une surface.
Laissez de l’espace pour :
- Inspectez les équerres
- Ajustez la position
- Évitez toute pression accidentelle
Vérifiez l’espace latéral
En particulier le côté du cockpit :
- Évitez de heurter les parois du meuble
- Laissez de l’espace pour vos mains
- Évitez tout contact accidentel
Vérifiez la solidité du mur ou du fond
⚠️ Point de sécurité critique
NE PAS monter sur :
- Panneaux fins de fond de meuble
- Panneaux décoratifs
Assurez-vous que la structure est :
- Solide
- Porteur
- Solidement fixé
Partie 4 : Démonter les éléments essentiels avant le montage
Étape 1 : Prendre des photos de référence
Avant de retirer quoi que ce soit, photographiez :
- Haut
- Centre
- Côtés
- Bas
Cela facilite grandement le réassemblage.
Étape 2 : Retirer les tourelles supérieure et inférieure
Avant de mettre le cadre central à découvert, vous devrez retirer les tourelles laser quadruples supérieure et inférieure. Cela laisse suffisamment d’espace pour les équerres en L et facilite grandement l’accès à la structure de support interne.
Retirer la tourelle supérieure
Commencez par soulever la tourelle laser quadruple supérieure du haut du modèle. Mettez-la de côté dans un endroit sûr pour éviter d’endommager les détails délicats.

Retirer la goupille de verrouillage rouge
Une fois la tourelle supérieure retirée, vous aurez accès à une goupille Technic rouge à l’intérieur de l’ouverture.
Retirez délicatement cette goupille rouge avant d’essayer d’enlever la tourelle inférieure.
Cette goupille sert de connecteur de verrouillage et maintient la tourelle inférieure en place. Si vous essayez de retirer la tourelle inférieure sans l’enlever au préalable, vous constaterez que l’ensemble ne se détachera pas, et le fait de forcer pourrait exercer une contrainte inutile sur les éléments LEGO environnants.
Retirer la tourelle inférieure
Une fois la goupille de verrouillage rouge retirée, la tourelle laser quadruple inférieure peut être facilement détachée par le dessous du modèle.
Le retrait des deux tourelles crée une ouverture dégagée au centre du Millennium Falcon, vous donnant un accès complet aux poutres de support internes et suffisamment d’espace pour positionner correctement les supports en L.
Astuce : Rangez ensemble la tourelle supérieure, la tourelle inférieure et la goupille Technic rouge dans un petit récipient ou un sachet à fermeture. Ces pièces sont faciles à égarer pendant l’installation ; les garder ensemble accélère considérablement le remontage une fois le support mural installé.
 Dégager :
- Barres transversales noires
- Passage de montage
👉 Si vous ne voyez pas clairement la structure interne, ne continuez pas.
Remettre en place la goupille de verrouillage rouge


Après avoir retiré la tourelle inférieure, réinsérez la goupille Technic rouge à son emplacement d’origine avant de poursuivre l’installation du support mural.
Bien que la tourelle inférieure reste retirée pendant le montage, la goupille rouge fait partie de la structure interne du Millennium Falcon et doit être remise à son emplacement d’origine. La remettre en place contribue à maintenir correctement fixée l’assemblage environnant pendant que vous poursuivez le travail sur le modèle.
Important : Seule la tourelle inférieure reste retirée afin de dégager l’espace nécessaire pour le support mural. La goupille Technic rouge doit être remise en place immédiatement après le retrait de la tourelle inférieure.
Étape 3 : Retirer les pièces latérales détachées

En particulier :
- Zone du cockpit
- Panneaux de bordure
- Connexions lumineuses
Partie 5 : Mesurer les points de support internes
Choisir la meilleure position de support
Une fois la structure interne localisée, vous remarquerez que les supports peuvent être positionnés sous l’une ou l’autre des deux principales poutres de support horizontales.
Cela vous offre deux options de montage possibles, selon votre configuration d’exposition préférée.
Option 1 – Poutre de support supérieure (Recommandée pour un affichage horizontal)

Soutenir le modèle par la poutre supérieure maintient le Millennium Falcon dans une position plus droite et horizontale contre le mur.
C’est l’option privilégiée si vous souhaitez que le vaisseau paraisse centré et équilibré, ce qui la rend idéale pour la plupart des présentations murales.
Elle nécessite également moins de démontage, car les éléments LEGO environnants peuvent généralement rester en place.
Option 2 – Poutre de support inférieure (recommandée pour un Affichage incliné)

Si vous souhaitez que le Millennium Falcon soit légèrement incliné vers l’avant, la poutre de support inférieure est le meilleur choix.

Cette position de montage modifie naturellement l’angle de présentation, donnant au vaisseau une apparence plus dynamique « en vol », que de nombreux collectionneurs apprécient.
Avant d’utiliser ce point de support, vous devrez toutefois retirer le petit ensemble d’échelle situé devant la poutre inférieure. L’échelle empêche le support de glisser complètement sous la poutre ; son retrait permet donc au support d’entrer correctement en contact avec la structure interne.
Bien que cette option nécessite une étape de préparation supplémentaire, elle offre tout de même un excellent soutien structurel lorsqu’elle est installée correctement.
Quelle option devez-vous choisir ?
- Choisissez la poutre de support supérieure si vous préférez une présentation murale plus droite et équilibrée.
- Choisissez la poutre de support inférieure si vous souhaitez que le Millennium Falcon soit présenté légèrement incliné, pour un rendu plus dynamique.
Quelle que soit l’option choisie, testez toujours la position du support avec un gabarit en carton avant de percer le moindre trou, afin de garantir un ajustement et un alignement corrects.
Étape 1 : Repérez les traverses noires
Ce sont vos principaux points de support.
Étape 2 : Mesurez l’espacement
Référence :
9,5 à 10 cm
Important
Utilisez UNE seule méthode de manière cohérente :
👉 Bord intérieur à bord intérieur (recommandé)
Mélanger les méthodes entraînera un mauvais alignement.
Étape 3 : Vérifiez la profondeur du support
Assurez-vous que le support :
- Glisse sous la traverse
- Ne pousse PAS contre les autres pièces
👉 Si vous sentez une résistance, arrêtez immédiatement.
Partie 6 : Testez tout avant de percer (fortement recommandé)
Utilisez un gabarit en carton
Découpez deux bandes :
- Larges de 3,5 à 4 cm
- Longues de 13 à 14 cm
Simulez l’installation réelle
Vérifiez :
- Les deux supports s’insèrent
- L’alignement est correct
- Aucune collision avec les pièces
- La profondeur est suffisante
Important
Si le carton ne passe pas, le métal ne passera pas non plus.
Partie 7 : Installez les supports
Étape 1 : Marquez les positions
- Tracez une ligne centrale
- Marquez l’espacement des supports
Étape 2 : Gardez tout de niveau
Si les supports sont irréguliers :
- Un côté supporte davantage de poids
- Le modèle peut s’incliner
Étape 3 : Installez progressivement

- Commencez sans serrer
- Ajustez l’alignement
- Serrez lentement
Important
Si les vis deviennent difficiles à enfoncer → ARRÊTEZ.
Une mauvaise taille de vis peut endommager votre structure.
Étape 4 : Testez la stabilité
Avant de monter le modèle :
- Appuyez légèrement sur les supports
- Vérifiez l’absence de mouvement
👉 Si quoi que ce soit bouge, ne continuez pas.
Partie 8 : Montage du modèle (étape critique – 2 personnes requises)
Étape 1 : Dégagez l’espace de travail
Retirez tous les obstacles.
Étape 2 : Soulevez correctement
- Une personne soutient le haut et le centre
- Une personne soutient le bas et l’alignement
Important
Ne soulevez jamais en utilisant :
- Cockpit
- Panneaux
- Tourelles
Étape 3 : Faites pivoter à la verticale

Faites cela lentement.
👉 Ne laissez PAS le bord inférieur supporter tout le poids.
Étape 4 : Soulevez au-dessus des supports
Vous devez le soulever légèrement plus haut que sa position finale.
Étape 5 : Alignez les ouvertures
Guidez les supports dans la structure centrale.
Avertissement critique
Si vous sentez une résistance → ARRÊTEZ.
Ne forcez PAS le modèle.
Étape 6 : Abaissez lentement
Les deux côtés doivent atterrir en même temps.
Étape 7 : Confirmer le soutien
Vérifiez :
- Les deux traverses sont soutenues
- Les deux supports sont engagés
- Aucun panneau ne doit porter de poids
Partie 9 : Vérifications de sécurité finales (À NE PAS IGNORER)
Vérifiez la structure
- Aucune déformation
- Aucun espace
Vérifiez l’alignement
- Modèle de niveau
- Aucune inclinaison
Vérifiez les supports et le mur
- Aucun mouvement
- Vis serrées
Relâchez lentement
NE relâchez PAS immédiatement.
Partie 10 : Renforcer les panneaux supérieurs dépendant de la gravité avant le montage mural
Lorsque le LEGO® Star Wars™ 75192 Millennium Falcon est exposé horizontalement, plusieurs panneaux supérieurs de la coque restent en place en partie parce que la gravité les maintient contre la structure principale.

Une fois le modèle monté verticalement, la gravité commence au contraire à tirer ces panneaux vers l’extérieur. Certains points d’assemblage et de connexion à faible friction d’origine peuvent donc sembler nettement plus lâches, même s’ils fonctionnent correctement lorsque le modèle est posé à plat.
Plutôt que de compter sur du ruban adhésif double face, les connexions desserrées peuvent être renforcées en remplaçant certaines connexions par axe par des goupilles de friction Technic compatibles.
Important : Effectuez ces modifications avant de soulever le Millennium Falcon pour le placer sur les supports muraux. Travaillez sur une surface souple et retirez d’abord la tourelle supérieure ainsi que les panneaux de coque desserrés.
Pièces utilisées pour le renforcement
Le renforcement présenté ci-dessous utilise :
- Une goupille de friction Technic noire compatible à double extrémité
- Une goupille d’axe Technic beige déjà utilisée ailleurs sur le modèle
- L’axe jaune d’origine retiré du panneau supérieur desserré
Cette méthode permet de réutiliser la goupille d’axe beige sur la connexion qui nécessite une meilleure retenue.
Étape 1 : Identifier les panneaux de coque dépendant de la gravité
Inspectez la surface supérieure du Millennium Falcon et repérez les panneaux qui bougent facilement lorsque le modèle est incliné.
Faites particulièrement attention aux éléments suivants :
- Les panneaux supérieurs de la coque avant
- Les sections à côté de la parabole de détection
- Les panneaux près du couloir du cockpit
- Les panneaux supérieurs arrière à côté de la zone des moteurs
- Tout panneau qui se soulève ou bouge lorsqu’on le tire doucement vers l’extérieur
Les flèches de l’image de référence indiquent les principales zones à vérifier avant l’exposition verticale.
Toutes les sections marquées n’utilisent pas nécessairement le même connecteur ; examinez donc chaque emplacement individuellement avant de modifier des pièces.
Étape 2 : Retirer la goupille d’axe beige de la section avant desserrée
L’un des ensembles avant desserrés utilise une goupille d’axe Technic beige.
Retirez délicatement cette goupille d’axe beige et remplacez-la par une goupille de friction Technic noire compatible à double extrémité.
La goupille noire crée une connexion plus solide à cet endroit tout en libérant la goupille d’axe beige pour l’utiliser sur un autre panneau supérieur.
Enfoncez complètement la goupille noire jusqu’à sa position, mais sans forcer. Les pièces environnantes doivent rester correctement alignées, sans se plier ni se séparer.
Étape 3 : Remplacer l’axe jaune sur le panneau supérieur desserré

Repérez le panneau supérieur desserré qui utilise l’essieu jaune illustré sur l’image de référence.
Retirez l’essieu jaune et remplacez-le par la goupille d’essieu Technic beige retirée à l’étape précédente.
Assurez-vous que :
- L’extrémité de l’essieu entre dans le trou d’essieu en forme de croix
- L’extrémité de la goupille entre dans le trou Technic rond correspondant
- La goupille beige est complètement insérée
- Le panneau reste correctement aligné avec la coque environnante
La friction créée par la goupille d’essieu Technic beige aide à empêcher le panneau de glisser vers l’extérieur lorsque le Faucon Millenium est monté verticalement.
La connexion doit sembler nettement plus ferme tout en restant amovible si le modèle doit être démonté ultérieurement.
Étape 4 : vérifiez les autres panneaux marqués
Répétez la même inspection autour de toutes les zones marquées d’une flèche.
Lorsqu’un panneau est maintenu par une connexion lâche dépendant de la gravité, déterminez si une goupille de friction compatible peut remplacer le connecteur d’origine à faible friction.
Ne supposez pas que chaque emplacement nécessite la même pièce. N’effectuez un remplacement que lorsque le nouveau connecteur correspond correctement aux trous Technic ronds et en forme de croix existants.
Ne forcez jamais une goupille de friction dans une ouverture incompatible, car cela pourrait exercer une contrainte inutile sur les éléments LEGO® environnants.
Étape 5 : effectuez un test vertical avec soutien
Avant de placer le modèle au mur, demandez à une autre personne de vous aider à le soutenir au-dessus d’une zone recouverte de moquette ou rembourrée.
Inclinez lentement le Faucon Millenium vers son angle d’exposition final et observez chaque panneau renforcé.
Vérifiez que :
- Aucun panneau ne glisse vers l’extérieur.
- Aucun panneau ne commence à se détacher de la structure principale.
- Les panneaux avant n’appuient pas sur l’emplacement de la tourelle supérieure.
- Les panneaux situés du côté du cockpit restent correctement alignés.
- Les connexions renforcées ne tordent ni ne déforment les éléments proches.
Replacez immédiatement le modèle en position horizontale si une section commence à bouger.
Étape 6 : réinstallez la tourelle supérieure en dernier

La tourelle supérieure doit rester retirée pendant le renforcement et les tests des panneaux de coque environnants.
Une fois le Faucon Millenium solidement fixé et chaque panneau proche ayant passé le test vertical, réinstallez la tourelle en dernier.
Vérifiez délicatement à nouveau les panneaux environnants pour confirmer qu’aucun ne peut se soulever, pivoter ou appuyer contre la base de la tourelle.
Cela est particulièrement important, car un panneau supérieur desserré peut déplacer la tourelle si le panneau commence à s’éloigner du modèle.
Le renforcement des panneaux environnants réduit considérablement ce risque, mais la tourelle doit tout de même être vérifiée séparément après l’installation.
Pièce 11 : réassemblez le modèle
Installez dans l’ordre :
- Panneaux centraux
- Modules latéraux
- Petits détails
Important
Ne réinstallez PAS les pièces qui :
- Touchez le mur
- Poussez le modèle vers l’extérieur
- Bloquez les supports
Résumé de l’installation
| Étape | Action |
|---|---|
| 1. Préparez | Rassemblez tous les outils, les équerres et le matériel de fixation. Assurez-vous que la surface de fixation est suffisamment solide pour supporter le modèle. |
| 2. Désassembler | Retirez la tourelle supérieure, retirez la goupille Technic rouge, détachez la tourelle inférieure, remettez la goupille rouge en place, puis retirez les panneaux centraux et toutes les pièces qui bloquent les équerres. |
| 3. Repérer les poutres de support | Repérez les deux possibilités de poutres de support internes et choisissez celle qui convient le mieux à votre exposition. Pour une stabilité maximale, il est recommandé d’utiliser la poutre de support inférieure. |
| 4. Mesurer et tester | Mesurez directement sur votre modèle l’écartement entre les équerres et testez l’ajustement avec un gabarit en carton avant de percer. |
| 5. Installer les équerres | Marquez la position de fixation, percez les trous et fixez les deux équerres en les maintenant parfaitement de niveau. |
| 6. Fixer le modèle | Soulevez le Faucon Millenium à deux, alignez les équerres avec les poutres de support choisies, puis abaissez lentement le modèle pour le mettre en place. |
| 7. Vérifier et réassembler | Vérifiez que les deux équerres soutiennent entièrement la structure interne avant de réinstaller les éléments LEGO amovibles qui ne gêneront pas le mur. |
 En conclusion : transformez votre construction en pièce maîtresse de votre exposition

Fixer un LEGO Millennium Falcon au mur ne consiste pas seulement à gagner de la place.
Il s’agit de mettre en valeur le modèle comme il le mérite.

Lorsqu’elle est correctement réalisée :
- Les équerres sont presque invisibles
- Le modèle semble flotter
- Toute la silhouette devient le point central

La fixation murale est-elle sûre ?
Lorsqu’elle est correctement réalisée, cette méthode de fixation offre une façon stable et sécurisée d’exposer votre LEGO Star Wars Faucon Millenium UCS.
Les facteurs essentiels sont d’utiliser de solides équerres métalliques en L pour charges lourdes, des fixations murales adaptées et de veiller à ce que les équerres soutiennent la structure interne du modèle plutôt que ses panneaux extérieurs.
Dans des conditions d’exposition normales, le modèle devrait rester solidement en place sans problème, à condition de ne pas être retiré ou repositionné fréquemment, ni soumis à une force inutile. Comme pour toute exposition murale, il est recommandé de vérifier régulièrement les équerres et le matériel de fixation afin de s’assurer que tout reste bien serré et sécurisé.
Cependant, la fixation murale ne convient pas à tout le monde.
Si vous préférez éviter de percer votre mur, ou si vous recherchez simplement une solution d’exposition présentant moins de risques, une vitrine sur pied constitue une excellente alternative. Une vitrine de qualité vous permet de présenter le Faucon Millenium UCS tout en le protégeant et en le gardant facilement accessible, sans installation murale permanente.


En fin de compte, la meilleure solution d’exposition dépend de l’espace disponible, de votre style de présentation préféré et de votre aisance à fixer au mur un modèle LEGO aussi imposant.


Ecrit par MaZhiyuan








1 commentaire
This is a fantastic guide, thank you! I was hoping for more detail on how to secure top parts without the help of gravity… I had the exact same idea for mounting and have completed it but the top front panels and gun turret don’t secure well without the help of gravity.
I used some double-sided tape in strategic locations at first but the top front panels came loose and pried the turret out of its spot. The turret landed on the floor and broke and took me a while to reassemble.
Deece
Laisser un commentaire
Ce site est protégé par hCaptcha, et la Politique de confidentialité et les Conditions de service de hCaptcha s’appliquent.